Basement Water Entry: The Most Common Sources (And the Quick Checks to Confirm Each One)
A Diagnostic Guide for Canadian Homeowners
By
Published: March 28, 2026
Credit: Shutterstock
Key Takeaways
•Where water appears, when it appears, and how it behaves narrows the likely source faster than any single test — pattern recognition is the first diagnostic tool
•Two simple tests — the polyethylene patch test and the standing water test — separate condensation from seepage from bulk leakage, and any homeowner can run both in a weekend
•The evidence you collect before calling a professional (photos, timing logs, test results) directly determines how fast and how accurately they diagnose the problem
Most homeowners discover basement water the same way: a damp patch, a puddle after rain, a musty smell that won't leave. The instinct is to fix what you can see — seal the crack, run a fan, lay down towels. But basement water entry is pattern-based. The location, the timing, and the way water behaves on the surface all point to a specific mechanism, and each mechanism demands a different response.
That distinction matters more than most people realize. Sealing a crack when the real problem is failed grading outside pushes water to the next weak point. Running a dehumidifier when the issue is hydrostatic pressure through the slab treats the symptom and ignores the cause. And calling a waterproofing contractor before understanding the pattern often means accepting a diagnosis you can't evaluate.
This guide maps the most common basement water entry sources to their visible symptoms, walks through the quick checks that confirm each one, and flags the escalation cues that separate a single-point defect from a whole-system drainage problem. Every check here is safe, non-invasive, and designed to produce evidence you can hand to a professional if and when you need one.
Advertisement — Article Continues Below
Cove Joint Seepage
Where the Wall Meets the Floor
The cove joint — the seam where the basement wall meets the floor slab — is one of the most common water entry points in Canadian basements. It is a cold joint: a place where new concrete was poured against concrete that had already cured. According to CMHC's basement drainage research, these interfaces are inherently prone to leakage because the two pours never fully bond, even when the wall surface looks intact.
What you'll see: A thin line of dampness or a narrow trickle running along the base of the wall, right at the floor line. It may appear along the entire perimeter or in isolated segments. After rain or snowmelt, the line darkens or widens. In dry weather, white chalky deposits (efflorescence) often remain as evidence of past moisture movement — a sign that water has been wicking through the concrete and leaving dissolved salts behind.
Quick Confirmation Checks
Start by correlating the dampness to weather. After the next significant rain, check the cove joint at 2-hour intervals and photograph what you see. If dampness appears 12–48 hours after rain and tracks along the wall–floor seam, groundwater under hydrostatic pressure is the most likely mechanism. If dampness appears within hours and only in one corner, surface water draining toward the foundation is more probable.
Walk the exterior. Look at the ground slope immediately against the foundation wall. Soil should slope away from the house at roughly a 5% grade over the first 1–2 metres. CMHC's research documented that backfill settlement over several years can actually reverse this slope, so ground that was once graded correctly may now direct water straight to the foundation.
Check downspout discharge points. Federal flood-ready guidance recommends extending downspouts at least 2 metres from the basement wall. If yours discharge closer than that — or worse, into a splash block that directs water back toward the house — that is a high-probability contributor.
What to do right now: Move any stored items away from the affected wall. Photograph the dampness line with a ruler or coin for scale. Note the date, recent precipitation, and whether the sump pump has been running. If you have a dehumidifier, place it nearby but understand that dehumidification addresses humidity — it does not stop water entry through the joint.
Warning
Do not apply waterproofing paint or hydraulic cement over the cove joint without understanding the source. Sealing the visible entry point when hydrostatic pressure is the driver can redirect water to the next weakest point — often a floor crack or an area behind finished walls where damage accumulates invisibly.
Escalation cue: If dampness appears along multiple walls or the full perimeter after rain, the pattern suggests a whole-system drainage issue — likely failed or clogged weeping tiles, poor grading on multiple sides, or rising groundwater — rather than a single-point defect. That distinction changes the next step from a crack repair to a drainage investigation.
Advertisement — Article Continues Below
Window Well Leaks
Credit: Shutterstock
Water Pooling Where It Shouldn't
Window wells that don't drain freely are a leading cause of water appearing around or below basement windows. The mechanism is straightforward: water from rain, snowmelt, or misdirected downspouts collects in the well, rises above the window seal or sill, and enters through or around the frame. CMHC identifies window wells that lack proper drainage as one of the most common exterior conditions driving basement moisture.
What you'll see: Water stains, dampness, or active dripping on the wall directly below a basement window. The wall may show efflorescence in a fan pattern spreading downward from the window frame. In severe cases, water pools on the floor directly beneath the window. Timing is tightly correlated with rain or rapid snowmelt — this is almost always a surface-water problem.
Quick Confirmation Checks
Inspect window wells from outside after rain. Is water standing in the well? Is the well filling with debris (leaves, soil, ice) that blocks drainage? Does the well have a gravel base that drains freely, or is it sitting on packed soil or clay?
Check whether any downspouts discharge near or into a window well. A single misdirected downspout can deliver hundreds of litres of water to a window well during a storm.
Look at the window seal itself. Run your hand along the bottom edge of the frame where it meets the foundation wall. If you feel dampness or see daylight, the seal has failed and water has a direct path inside.
What to do right now: Clear debris from the well. If water is standing, bail it out and note how quickly it returns. Temporarily redirect any nearby downspout extensions away from the well. Photograph the well, the window seal, and any interior staining — this is exactly what a contractor will need to see during a quoting visit.
Tip
After clearing and redirecting water, monitor through the next rain event. If interior dampness stops entirely, you have confirmed the source and may only need a well cover, improved drainage gravel, and a resealed window frame — not a full waterproofing job.
Escalation cue: If water still appears below the window after the well is cleared, drained, and downspouts are redirected, the issue may be subsurface — water migrating through the soil at or below the window-well base and entering through the foundation wall rather than over the sill. That points to a drainage or grading investigation rather than a window repair.
Cracks in foundation walls — whether hairline or visible from across the room — give water a direct path through the concrete. Hydrostatic pressure from saturated soil pushes water through even small cracks, and freeze-thaw cycling in Canadian climates can widen them over successive seasons.
What you'll see: A wet streak or stain that follows the line of a crack, often running vertically or diagonally. The crack may be damp to the touch even when the surrounding wall is dry. Efflorescence commonly forms along the edges of the crack, marking where dissolved minerals have been deposited by evaporating moisture. After storms, the crack may actively weep — producing a visible trickle or series of beads.
Quick Confirmation Checks
Map the crack. Mark its current endpoints with a pencil and date them. Check again in 30 days. If the endpoints have moved, the crack is active and may indicate ongoing structural settlement rather than a static, weather-related issue.
Correlate with weather. Photograph the crack during dry conditions and again 24–48 hours after a significant rain. If the crack weeps only after rain and dries completely between events, the water source is almost certainly surface or near-surface runoff rather than a high water table.
Health Canada's building stewardship guidance recommends inspecting foundations specifically after storms, heavy precipitation, and rapid snowmelt to determine whether moisture has entered and where. Adopt this as a habit: a 5-minute walk around the exterior and a check of known crack locations after every major weather event builds a diagnostic timeline.
What to do right now: Photograph the crack with a ruler for scale. Note its orientation (vertical, horizontal, diagonal, stair-step), length, and width. If it is actively weeping, place a towel or shallow container below to catch water and measure accumulation. Do not attempt to inject or seal the crack yourself — improper sealing can trap moisture inside the wall.
Important
Horizontal cracks in poured concrete or stair-step cracks in block foundations can indicate lateral soil pressure on the wall. These are structural concerns that warrant professional evaluation beyond water entry alone. Document them thoroughly and prioritize a structural assessment.
Escalation cue: Multiple cracks in the same wall, cracks that are widening over time, or cracks that appear on opposing walls in a mirror pattern all suggest foundation movement rather than isolated shrinkage. This shifts the conversation from water management to structural engineering.
Advertisement — Article Continues Below
Floor Cracks and Slab Seepage
Credit: Shutterstock
When Water Comes Up From Below
Water can enter through cracks in the basement floor slab or seep through the concrete itself by capillary action. The slab sits directly on the soil (or on a layer of granular fill), and when the water table rises or drainage below the slab fails, moisture migrates upward through the concrete or finds its way through cracks and joints.
What you'll see: Darkened patches on the floor that don't correspond to any wall leak or spill. The dampness may appear uniformly across a broad area (suggesting capillary action through the slab) or concentrate along a crack line (suggesting a more direct pathway). In some cases, white efflorescence appears on the floor surface — evidence of sustained moisture movement through the concrete.
Quick Confirmation Checks
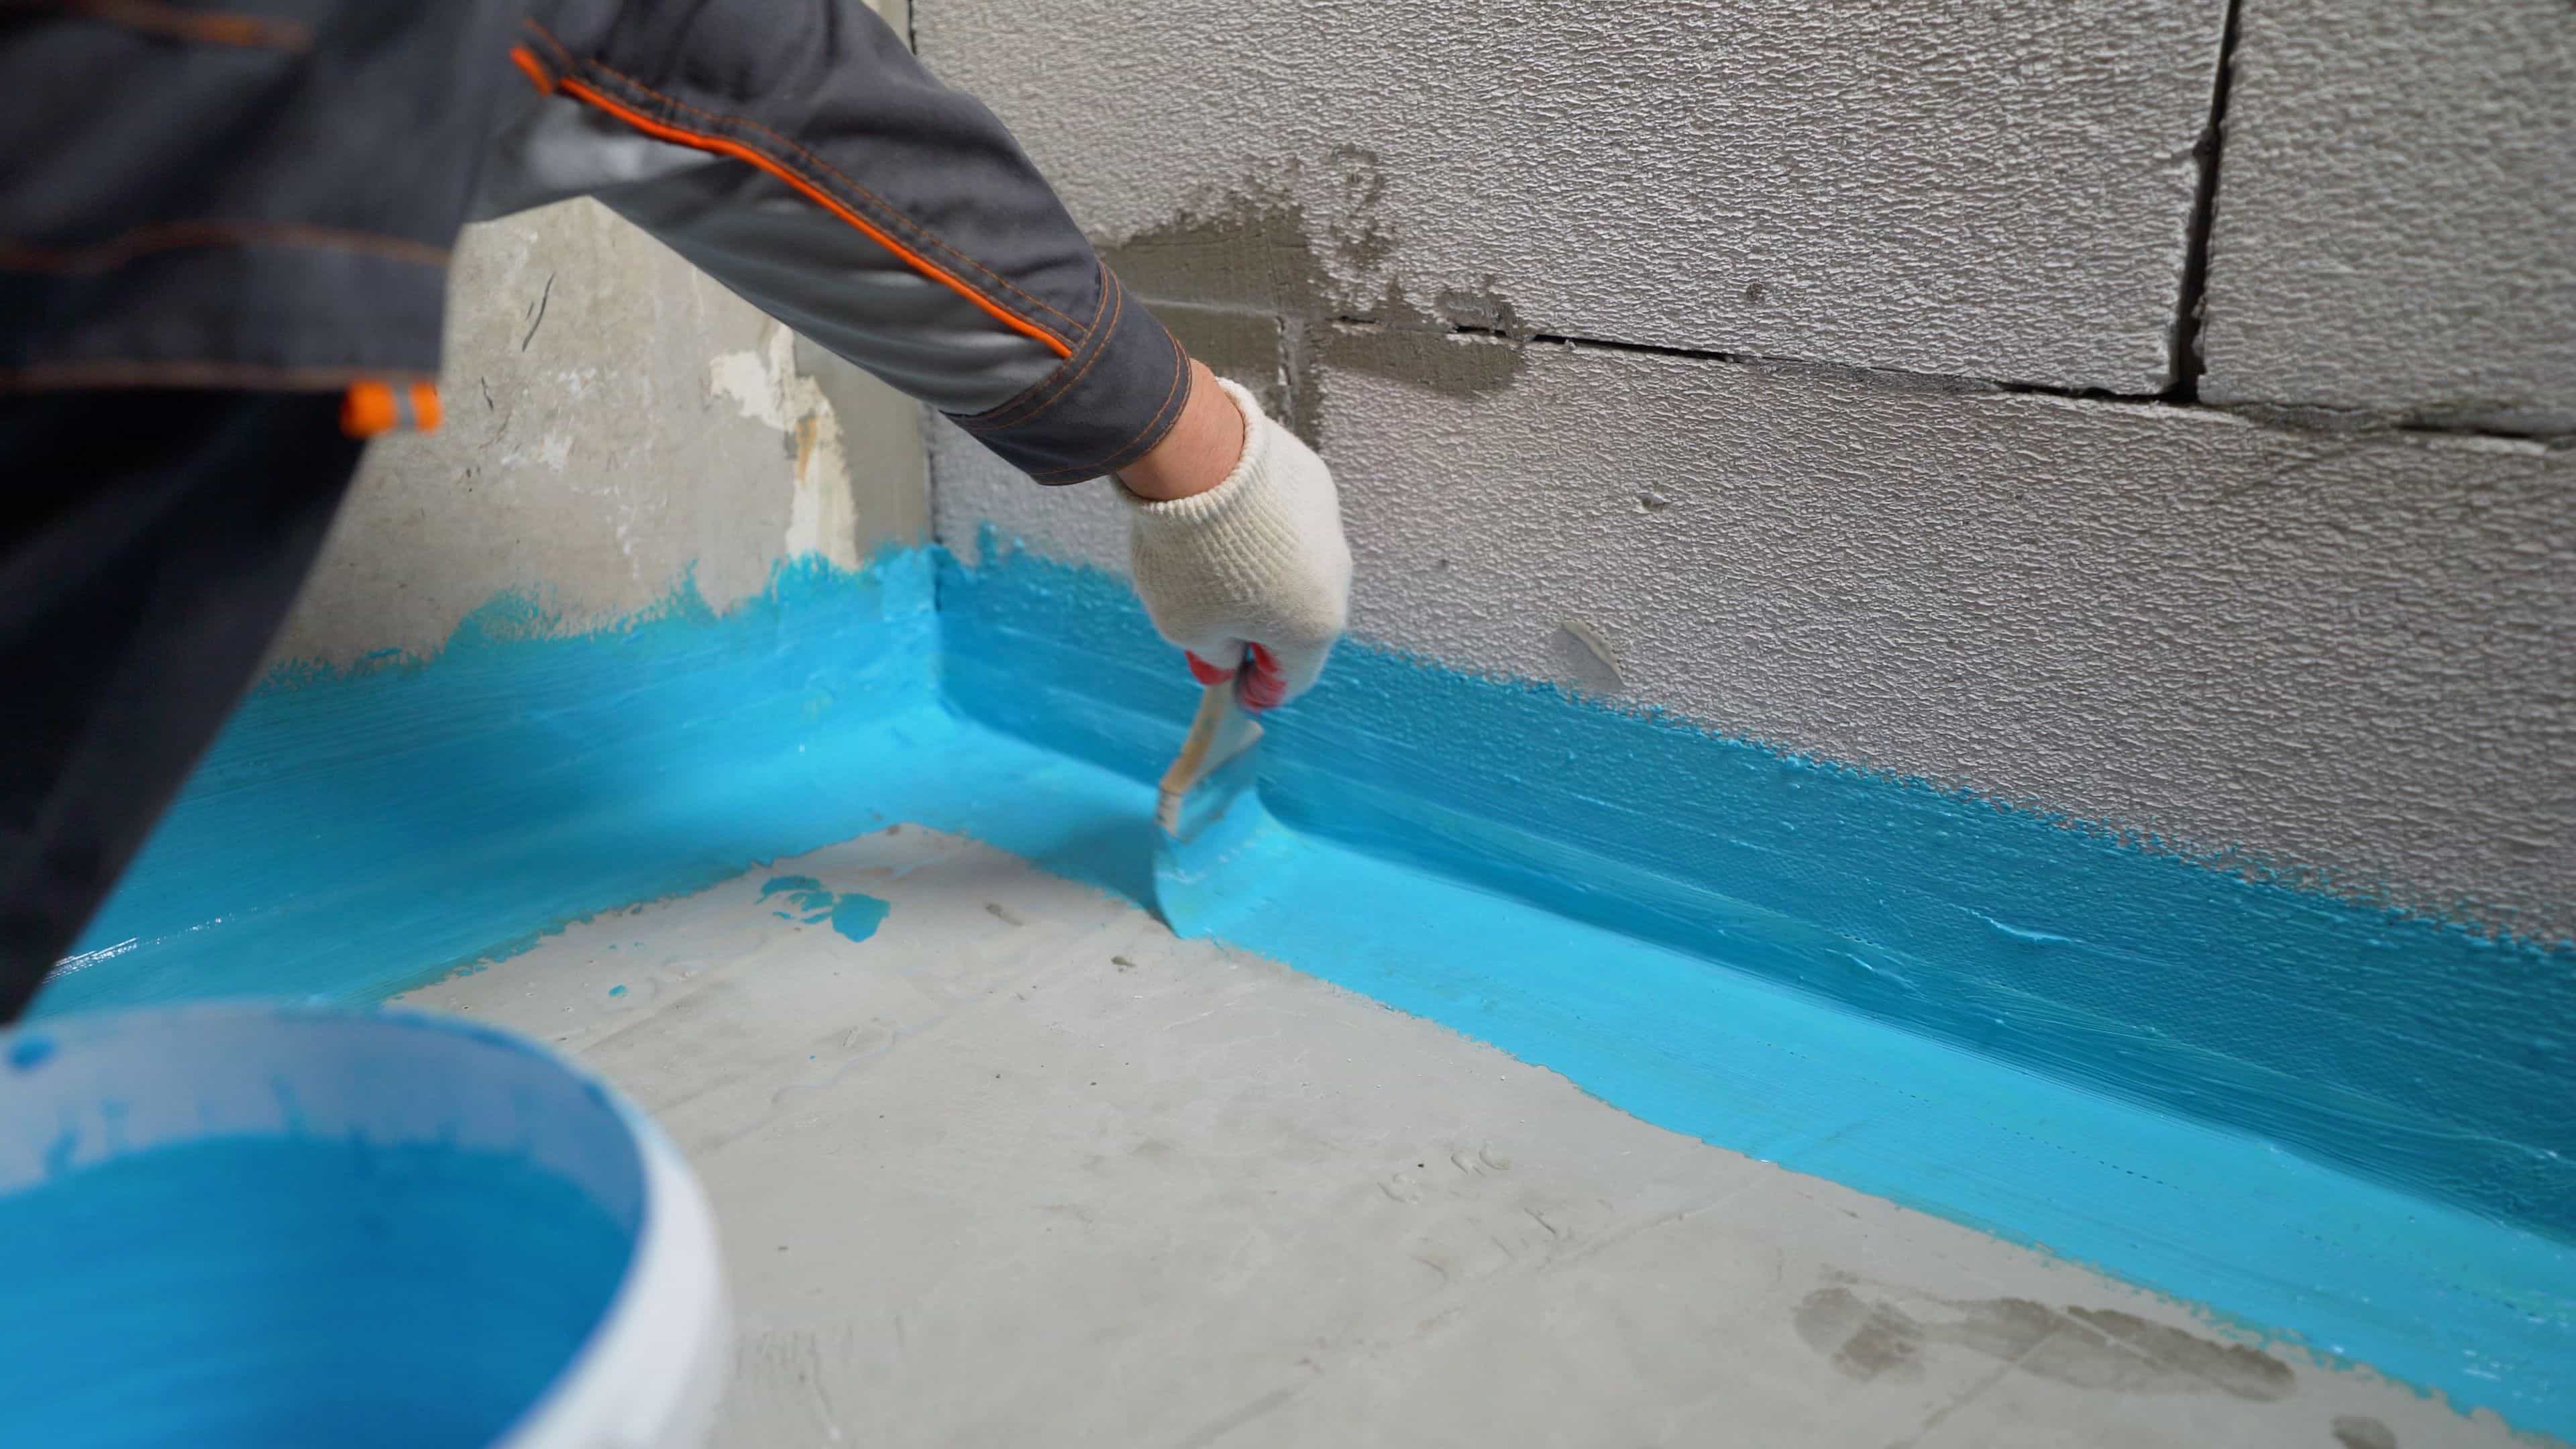
The polyethylene patch test. This is a simple, authoritative test described in CMHC's drainage research that any homeowner can perform. Tape a clear sheet of polyethylene (a piece of vapour barrier or even heavy plastic wrap) tightly to the floor, roughly 60 cm × 60 cm (2' × 2'). Leave it undisturbed for at least 2–3 days. Then check:
Moisture on the underside of the plastic = water is moving up through the slab by capillary action (ground moisture)
Moisture on the top surface of the plastic = condensation from humid indoor air settling on the cool surface
Both surfaces dry = minimal moisture movement during the test period
Place patches in multiple locations — the affected area, a dry-looking area nearby, and the centre of the room — to compare. Photograph each patch when you peel it up.
The standing water test. Observe damp areas over several hours after a storm. Does actual standing water form — beads or puddles on the surface? Or does the concrete darken without pooling? Standing water indicates bulk leakage from below or from wall leaks draining onto the floor. Darkened but non-pooled dampness suggests capillary wetting or condensation.
CMHC's framework combines these two tests to classify severity: if both pass (no moisture, no standing water), the problem is minor. If the patch test fails but there's no standing water, it's moderate. If both fail, it's a major moisture problem likely requiring drainage correction.
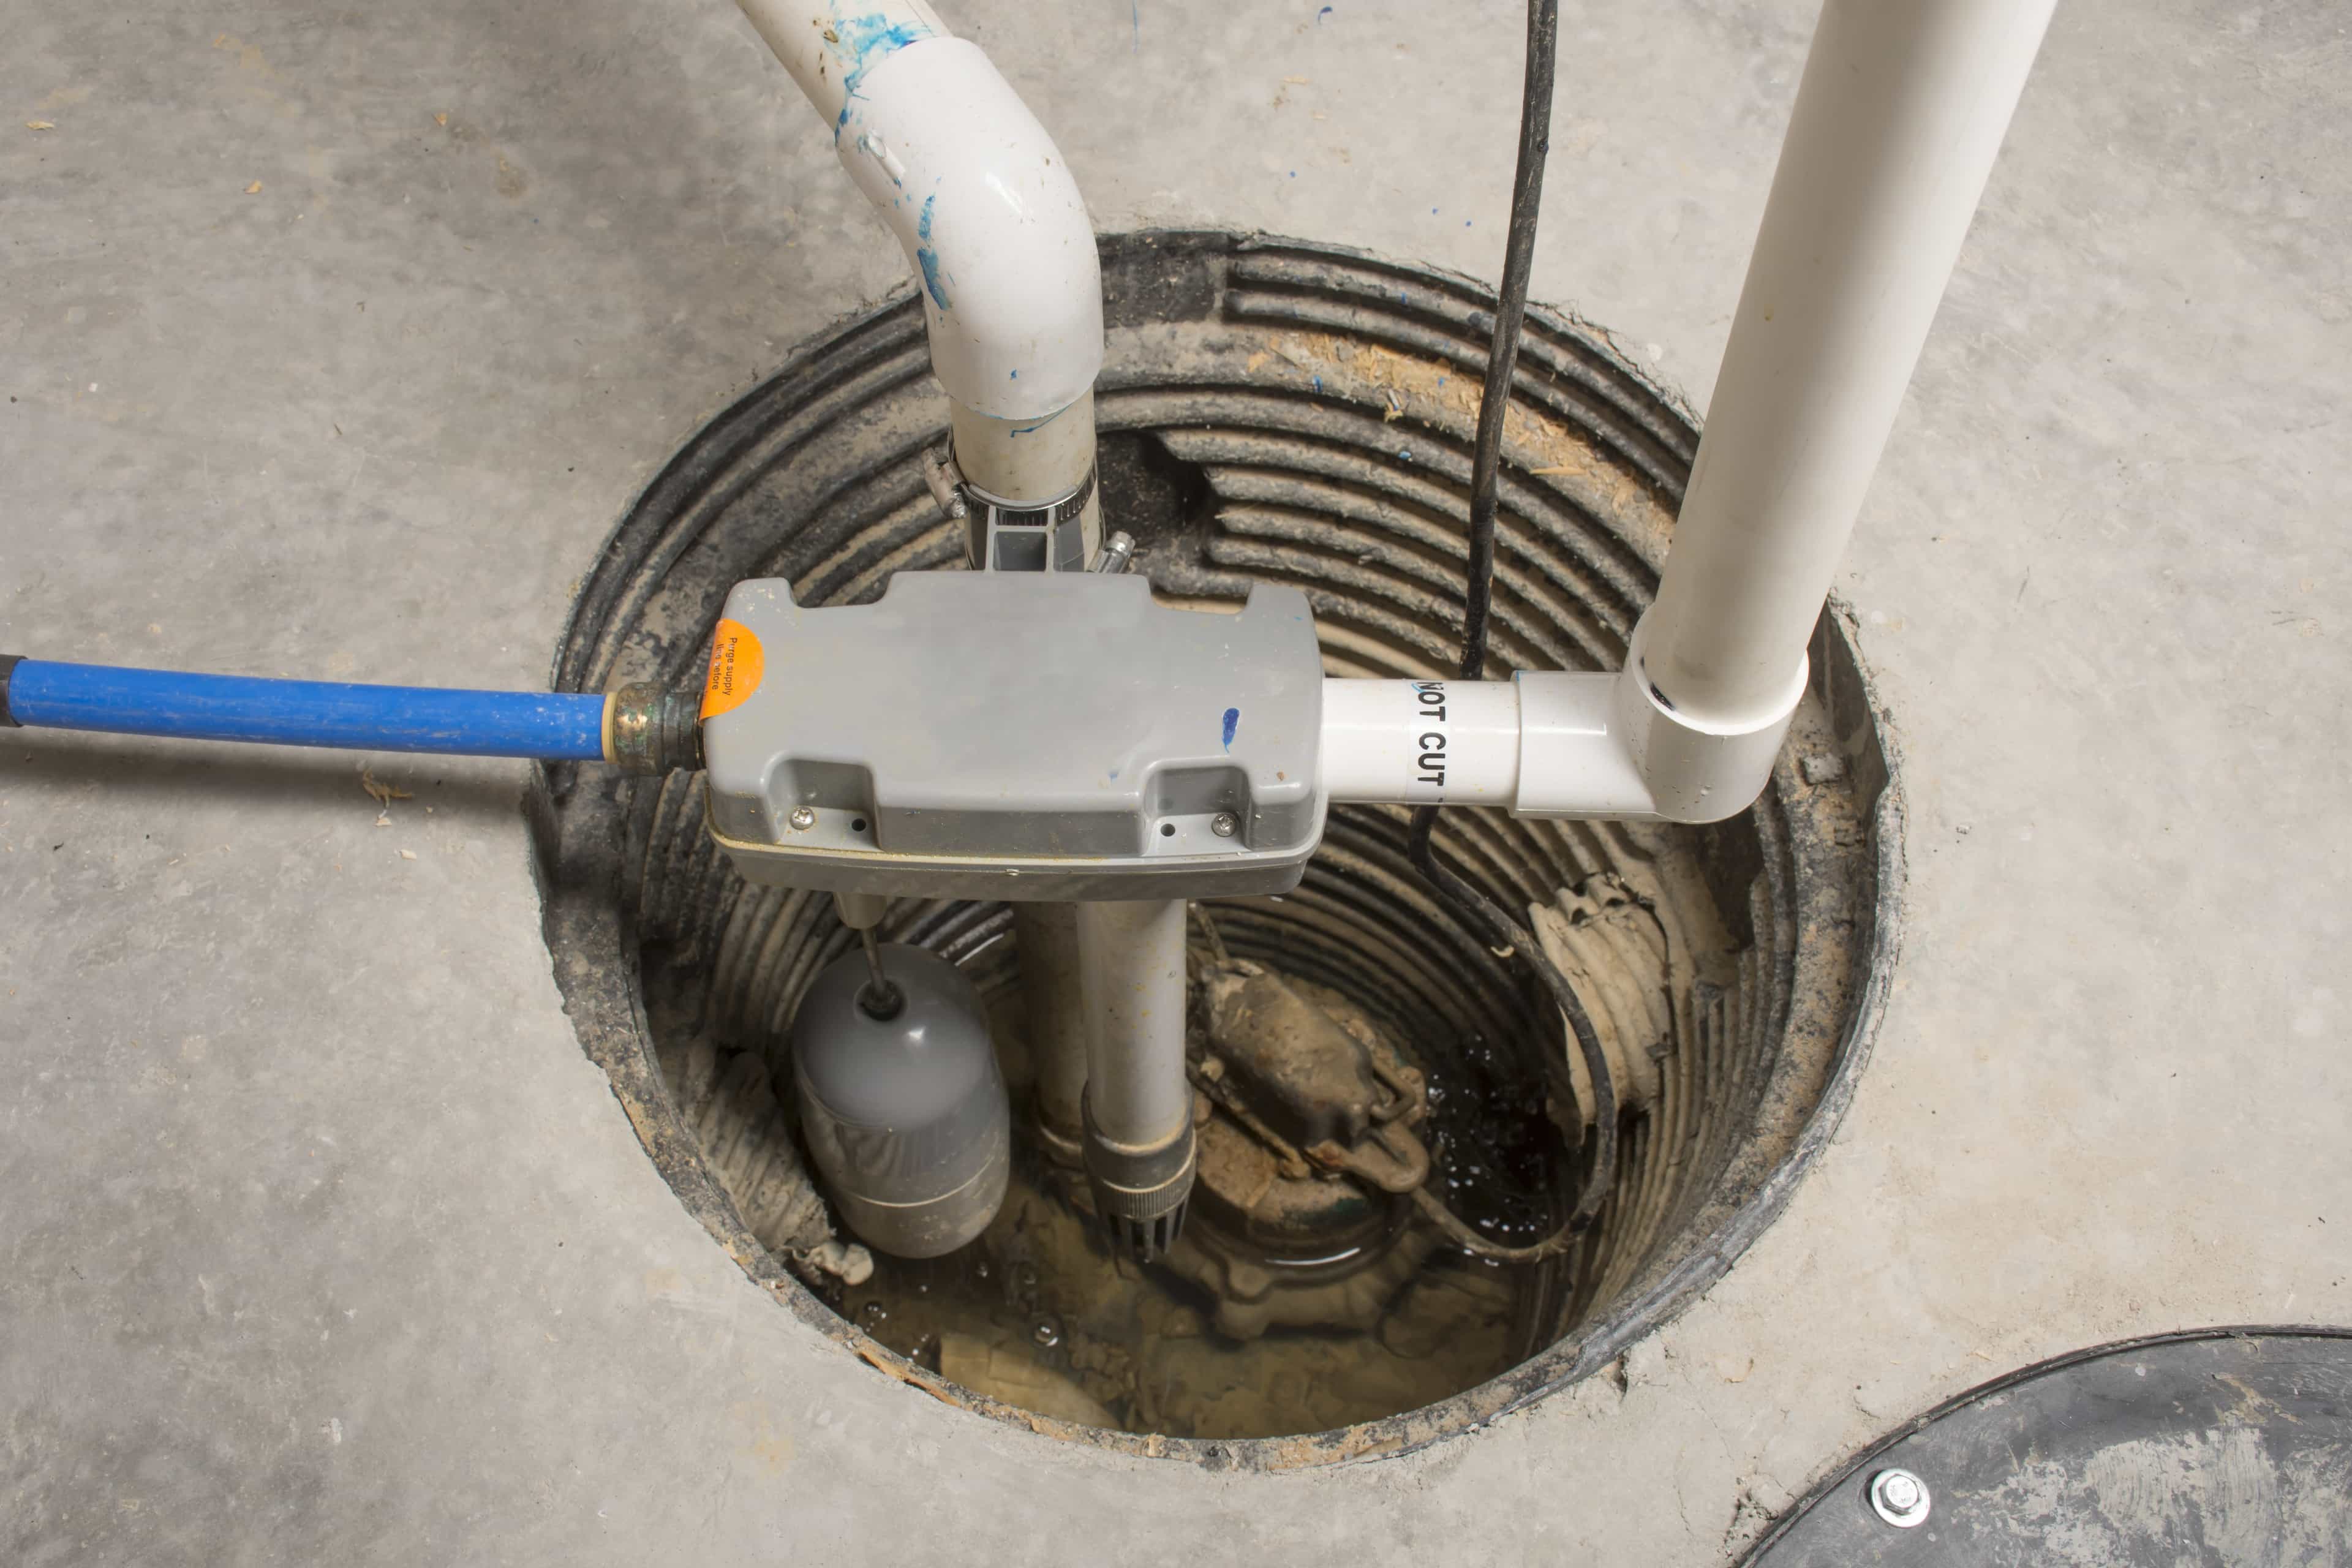
What to do right now: Run both tests. Document results with dated photos. If you have a sump pump, note how often it cycles during and after rain — continuous operation may indicate water recirculating between the soil and foundation drains rather than being effectively removed from the site.
Escalation cue: Moisture appearing across the full slab, patches that fail in multiple locations, or standing water after moderate rain all suggest a water-table or underslab drainage issue rather than an isolated crack. This is a systemic problem. Bring your patch-test photos and sump-pump run logs to a drainage contractor.
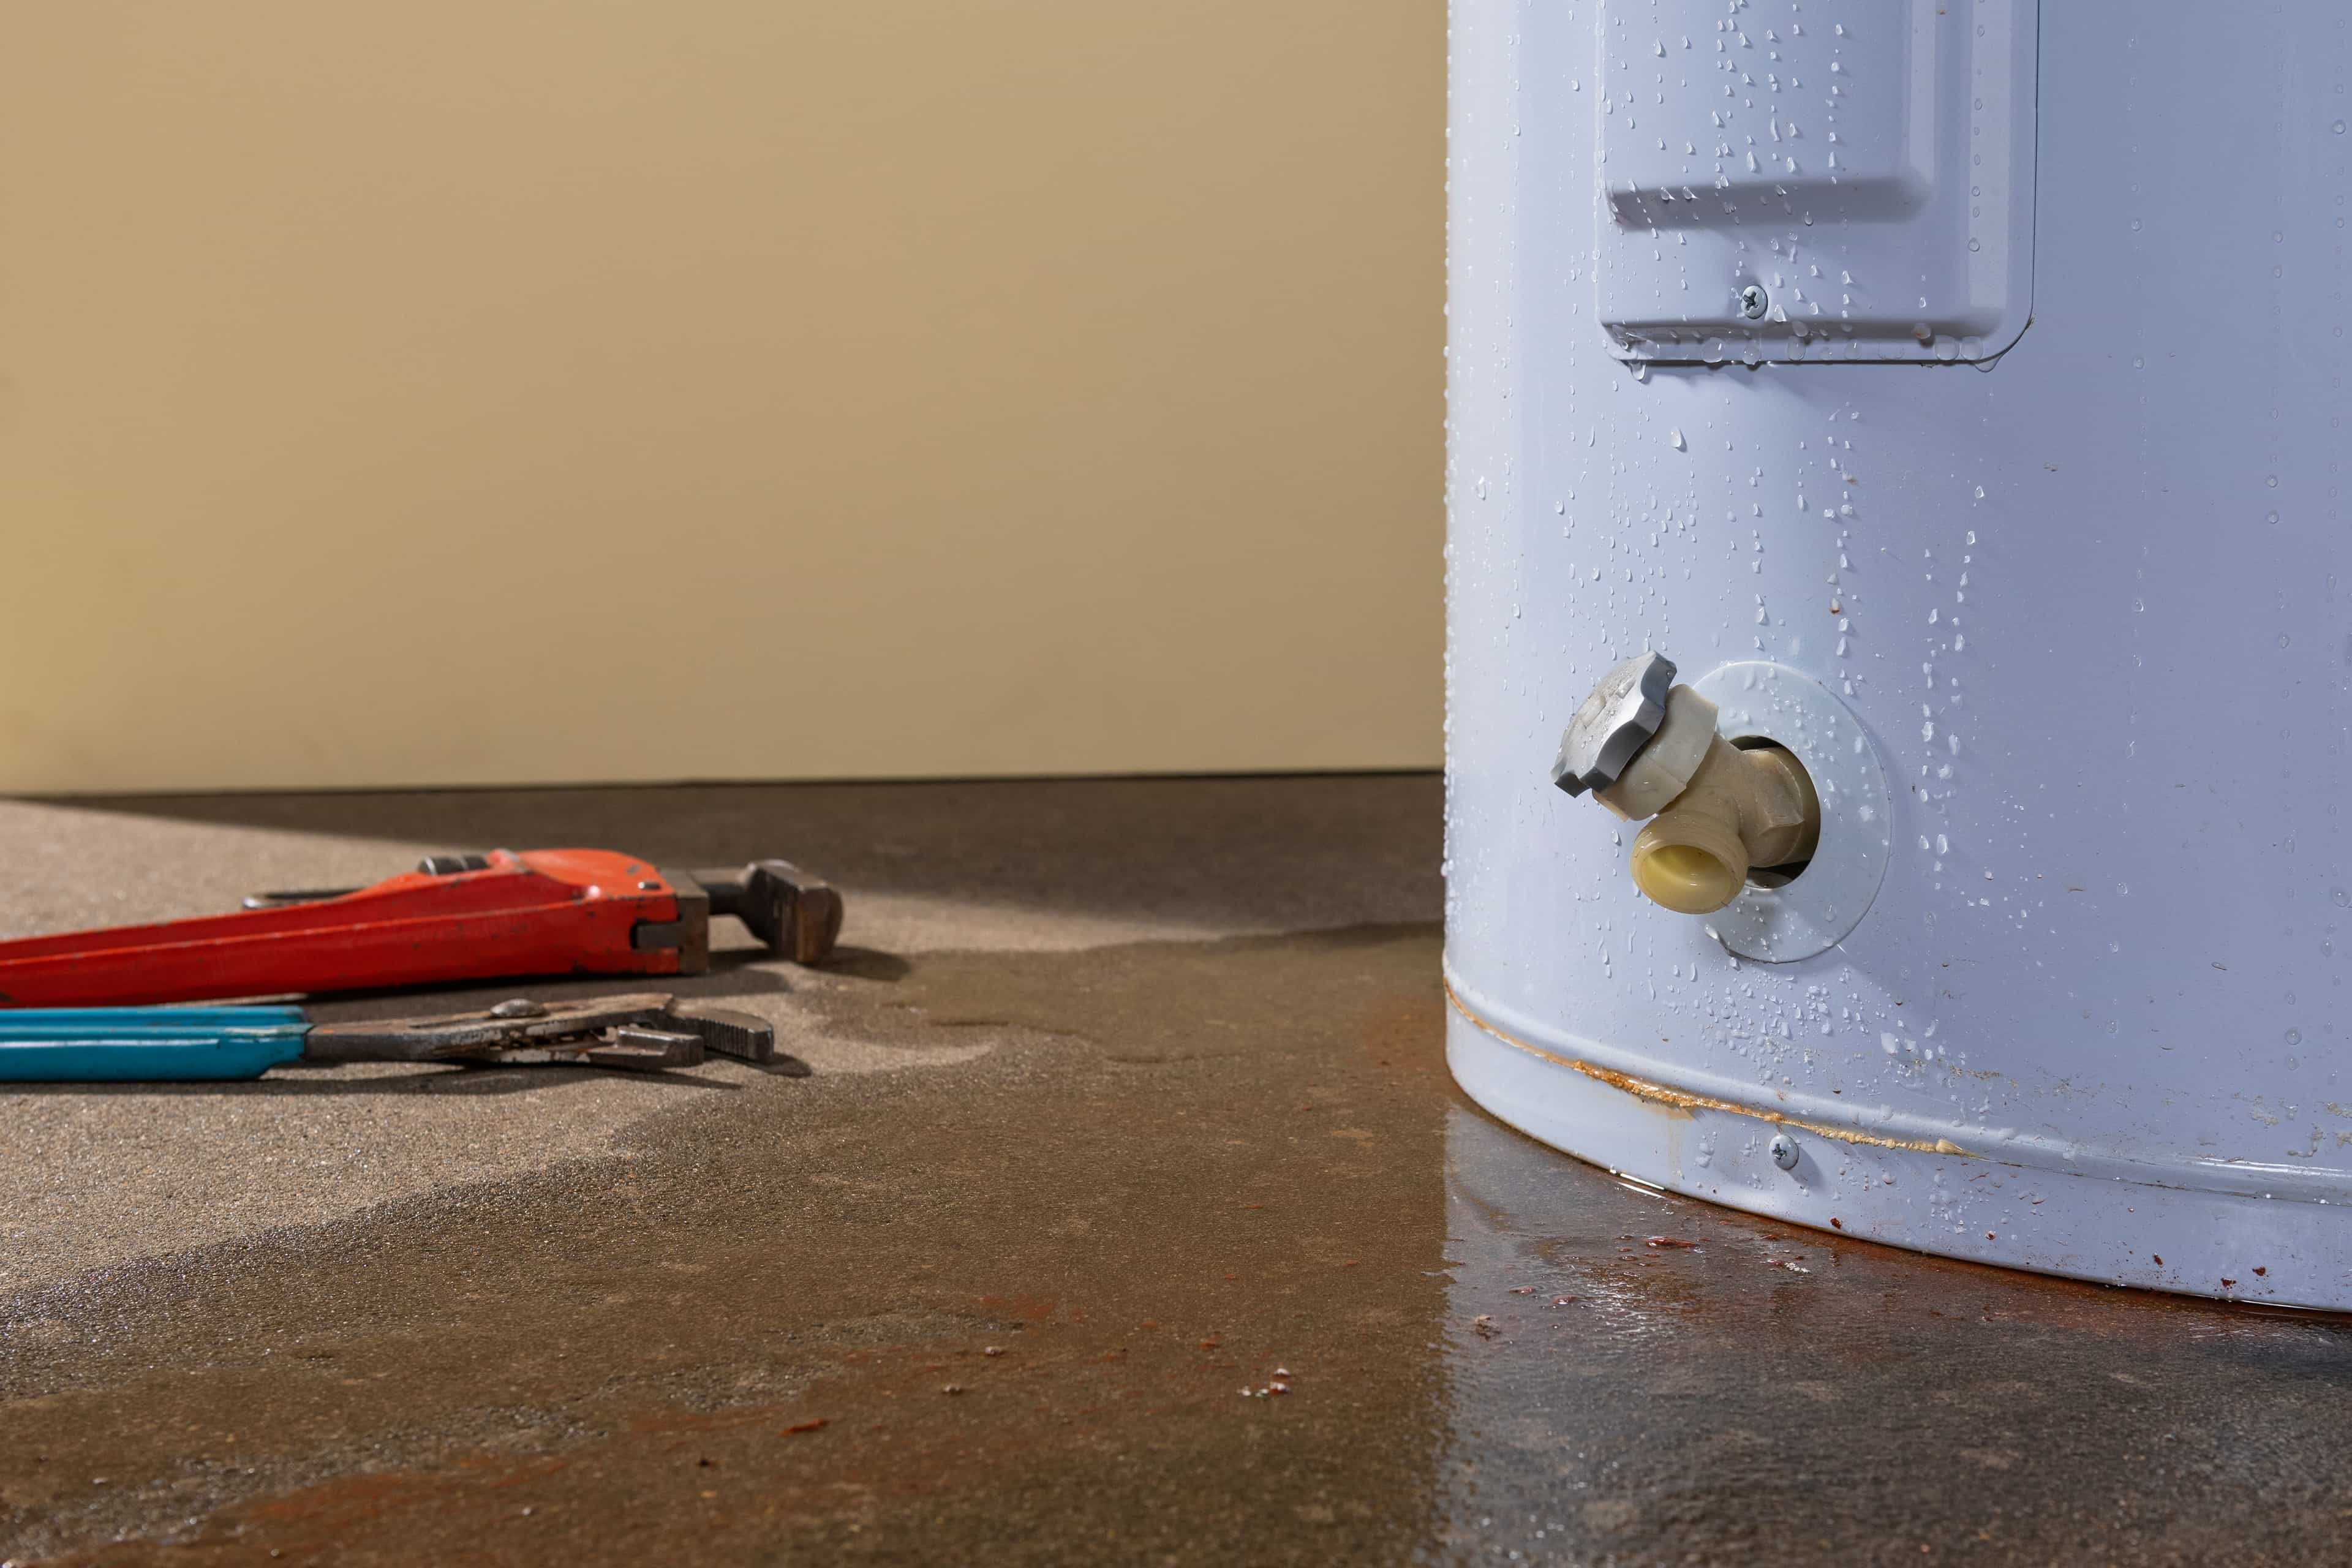
Not all basement water comes through the building envelope. Supply lines, drain connections, water heaters, washing machines, and toilets can all leak — sometimes slowly enough that the resulting dampness looks like foundation seepage until you notice it doesn't correlate with rain.
What you'll see: Dampness or staining near plumbing fixtures, appliances, or along the path of pipes. Water may pool around the base of a water heater, behind a washing machine, or near a toilet. The key differentiator: plumbing leaks are weather-independent. If the dampness is present during a dry spell, or if it worsens after high water use (laundry day, multiple showers) rather than after rain, plumbing is the leading suspect.
Quick Confirmation Checks
The water meter test. Shut off every faucet, appliance, and fixture in the house. Check the water meter. Wait 30 minutes without using any water, then check again. If the meter has moved, water is leaving your supply system somewhere. This doesn't pinpoint the leak, but it confirms one exists.
The toilet dye test. The U.S. Environmental Protection Agency's leak detective guidance recommends placing a few drops of food colouring into the toilet tank, then waiting 10 minutes without flushing. If colour appears in the bowl, the flapper valve is leaking — a common source of water waste that can also cause localized dampness around the base if the toilet seal is compromised.
Visual pipe inspection. Walk the basement and look at every visible pipe, fitting, and valve. Run your hand along joints and connections. Even a slow drip at a fitting can produce enough moisture over weeks to create a damp patch on the floor below.
What to do right now: If you find an active leak, shut off the supply valve to the affected fixture or appliance. Mop up standing water and photograph the source. Note whether the dampness pattern changes — if the area dries out completely over the next few days with no rain, you've confirmed a plumbing source.
Note
Water heaters have an expected lifespan. If yours is older and you notice dampness around its base or the drain pan, that's a replacement signal, not a foundation problem. Check the manufacturer's date code on the unit's label.
Escalation cue: If the meter test shows water loss but you cannot find any visible leak, the issue may be in a supply line running under the slab or behind a finished wall. That requires a licensed plumber with leak detection equipment — do not start opening walls or breaking concrete on speculation.
Advertisement — Article Continues Below
Condensation
When the Water Was Already in the Air
Condensation is the most commonly misidentified basement water source. Cool basement surfaces — walls, floors, pipes, windows — attract moisture from warm, humid indoor air, especially in summer. The result looks like seepage: beaded droplets on pipes, damp patches on walls, film on windows, and a musty smell. But no water is entering from outside.
Health Canada's moisture and mould guidance specifically recommends running a dehumidifier (with windows closed) when condensation appears on cold surfaces or when indoor relative humidity exceeds about 50%. It also advises insulating cold-water pipes with foam to eliminate condensation surfaces.
What you'll see: Beads or film of moisture on cold-water pipes, toilet tanks, ductwork, and windows. Walls may feel clammy to the touch, especially exterior walls that are cooler than interior air. The basement may smell damp or stuffy. Critically, these symptoms appear or worsen during warm, humid weather — the opposite pattern from rain-driven leaks.
Quick Confirmation Checks
Humidity check. A basic hygrometer (available for under $20 at any hardware store) tells you the relative humidity. Above 50% in a basement is a condensation risk. Above 60% is almost certainly producing visible moisture on cool surfaces.
The patch test again. If you ran the polyethylene patch test from the floor crack section, check what happened on the top surface. Moisture on the top = condensation. This is the simplest way to separate "water coming through the slab" from "water already in the air."
Activity correlation. CMHC asks homeowners to consider whether moisture-producing activities — drying laundry, long showers, cooking — occur in or near the basement, and whether the space is adequately ventilated. If dampness increases after laundry days or when a dryer vent is disconnected, indoor humidity is the driver.
What to do right now: Close basement windows during humid summer weather (counter-intuitive, but opening them introduces more moisture). Run a dehumidifier. Insulate exposed cold-water pipes with foam sleeves. Move stored items away from exterior walls to allow air circulation.
Tip
Track humidity with a hygrometer for one week while running a dehumidifier. If visible dampness disappears as humidity drops below 50%, condensation was the source — and no foundation work is needed.
Escalation cue: If humidity stays stubbornly above 60% even with a dehumidifier running and windows closed, moisture may be entering the air from a hidden source — capillary action through the slab, a concealed plumbing leak, or bulk water evaporating in a crawlspace. In that case, the condensation is a secondary symptom, not the root cause.
When water rises from a floor drain, toilet, or other plumbing fixture during or shortly after heavy rain, the source is typically the municipal sewer or storm system — not a crack in the foundation. In many older Canadian houses, the weeping tiles and basement floor drain connect directly to the storm sewer. During intense storms, the system can be overwhelmed, and water — sometimes mixed with sewage — is forced back up through those connections.
A CMHC urban drainage study of real Canadian storm events found that roughly 60% of reported basement floodings during major storms were caused by backup of sanitary building drains due to overtaxed sewer systems, while about 26% were caused by surface runoff entering through building leaks. Only about 14% originated directly from storm sewer connections.
What you'll see: Water rising from floor drains, toilets, or basement sinks during or immediately after heavy rain. The water may carry an odour, appear discoloured, or contain debris. Multiple fixtures may be affected simultaneously. The timing is tightly linked to intense rainfall events, not to sustained wet weather.
Quick Confirmation Checks
Fixture behaviour during storms. During the next heavy rain, watch the floor drain and the lowest fixtures (toilets, laundry sink). Do they gurgle? Does water level rise? Does water back up and overflow? Gurgling alone indicates the system is under pressure. Active overflow confirms backup.
Backwater valve check.The Government of Canada recommends backwater valves for all homes with basements, particularly those with older municipal sewer infrastructure or combined sewer systems. If your home has one, check the inspection chamber (the access box flush with the basement floor). A visible, transparent-topped valve that opens and closes freely is functioning. A valve caked with grease or debris may be stuck open and offering no protection.
If you don't know whether your home has a backwater valve, look for a round access panel in the basement floor near the main drain line — typically near the front of the house. No panel, no valve.
What to do right now: Do not step into standing water if there is any possibility of contact with electrical outlets, appliances, or cords. Ontario's flooding recovery guidance and federal preparedness materials both stress this point: never attempt to shut off power at the breaker box if you must stand in water. Call your electrical utility instead.
If the water has receded and the area is safe, photograph the affected drains and fixtures, note the timing relative to the storm, and check whether the problem recurs. Contact your municipality to ask whether combined sewer overflows were reported in your area during the event.
Important
Sewer backup water can contain raw sewage. Do not handle it without rubber gloves, and do not allow children or pets near affected areas. If your basement has flooded from a drain backup, follow the first-day cleanup steps before any further investigation.
Escalation cue: Repeated backup during moderate storms (not just extreme events) suggests either a partially blocked lateral, a missing or failed backwater valve, or a municipal system capacity problem. Bring your timeline of events (dates, storm intensity, which fixtures were affected) to a licensed plumber. If the problem is system-wide, your municipality may have a subsidy program for backwater valve installation — many Canadian cities now offer rebates.
Advertisement — Article Continues Below
If You Call a Pro, Bring This Evidence
The difference between a quick, accurate diagnosis and a slow, expensive one often comes down to what the homeowner has already documented. Professionals need pattern data — where water appeared, when, how it behaved, and what changed. Without it, they're starting from zero.
Your Evidence Checklist
Photos with timestamps. Photograph every damp area, crack, stain, and puddle when you first notice it and again after it dries. Include a ruler or coin for scale. Your phone's metadata records the date and time automatically.
Weather correlation log. Note the date of each observation and the recent weather: rain in the last 24 hours? Snowmelt? Extended dry period? The pattern of "water appears 24 hours after heavy rain at the cove joint on the north wall" is enormously more useful than "the basement gets wet sometimes."
Patch test and standing water test results. If you ran these, photograph the plastic when you peel it up — top and bottom. A contractor who sees moisture on the underside of the patch knows immediately that sub-slab moisture is in play.
Sump pump run log. If your sump pump runs during wet weather, note how frequently it cycles (every 5 minutes? Every hour? Continuously?) and whether the discharge is routed away from the foundation. Continuous cycling during moderate rain is a strong signal of water recirculation or drainage failure.
Plumbing test results. If the meter test showed water loss, or if the toilet dye test identified a leak, note those results. Ruling out plumbing saves the contractor time and saves you money.
Historical clues. Tide lines on the floor, efflorescence bands on walls, peeling paint, corrosion on exposed pipes, and musty odours that persist after cleaning all tell a story about moisture that may have been present long before the current episode. These signs should always be traced back to their source — they often indicate ongoing or recurring problems, not isolated events.
Exterior conditions. Note which way the ground slopes near affected walls, where downspouts discharge, and whether patios or walkways have settled to create reverse slope toward the house. Photograph anything that looks like it directs water toward the foundation.
Tip
Print or save this checklist on your phone. The next time it rains heavily, spend 15 minutes walking the exterior and checking the basement. One documented event with clear observations is worth more to a contractor than a year of vague concerns.
Residential flood damage in Canada is estimated at roughly $2.9–$3.0 billion per year, and the average basement flood repair exceeds $40,000. Understanding where the water is coming from — before spending money — is not a precaution. It's the single most cost-effective step in the entire process.
Ryan is the founder of Homeowner.ca and a proud Canadian homeowner based in Guelph, Ontario. Over his 25-year career in digital publishing, he has focused on transforming complex information into clear, practical guidance that helps people make confident, well-informed decisions.
The polyethylene patch test is the fastest way. Tape a clear plastic sheet to the damp surface for 2–3 days. Moisture on the underside means water is coming through the concrete. Moisture on the top means humid air is condensing on the cool surface. You can also check timing: condensation worsens in warm, humid weather, while leaks worsen after rain or snowmelt.
Efflorescence — the white, chalky deposits on concrete or masonry — indicates that moisture has moved through the wall and left dissolved salts behind as it evaporated. It is a reliable marker of past or ongoing moisture movement, not just a cosmetic issue. Ongoing efflorescence means the moisture source has not been resolved.
It depends on the source and severity. Minor condensation controlled by a dehumidifier is manageable. But persistent dampness from seepage, a rising water table, or drainage failure can damage finishes, promote mould growth, and compromise air quality. The patch and standing water tests help classify severity.
Frequent cycling during heavy rain is expected. Continuous operation during moderate rain or even dry periods is not — it often indicates that sump discharge is draining back toward the foundation and recirculating through the weeping tiles, or that the drainage system is overwhelmed. Check where the discharge pipe routes water and whether the ground slopes away from that point.
Surface sealants and hydraulic cement are temporary measures at best. If hydrostatic pressure is driving water through the crack, surface patches will fail or redirect water to the next weak point. Professional crack injection (using epoxy or polyurethane) addresses the full depth of the crack and is the standard repair for leaking wall cracks.
Look for a round access panel (about 15–20 cm in diameter) in the basement floor, typically near the main drain line close to the front of the house. Many newer homes (built in the last 20–30 years) have one installed. If you don't see an access panel, your home likely does not have a valve. Your municipality may offer rebates for installation.
Coverage depends on the source. Standard policies typically cover sudden plumbing failures but may exclude overland flooding, sewer backup, or groundwater seepage unless you've purchased specific endorsements. Contact your insurer to understand exactly what's covered — and document every water event with photos and timing logs regardless, as that documentation supports any future claim.
Four things: ground slope near the foundation (should slope away at 5% over 1–2 metres), downspout discharge distance (at least 2 metres from the wall), window well drainage (no standing water, no debris), and whether patios, walkways, or driveways have settled to create reverse slope toward the house. These exterior conditions drive many "mystery" interior leaks.
Not always. If water is in contact with electrical outlets, appliances, or cords, do not enter. Do not attempt to turn off the breaker if you must stand in water. Call your electrical utility to shut off power first. If sewer backup is suspected, the water may contain harmful bacteria — wear rubber gloves and keep children and pets away.
Call a professional when: the patch test and standing water test both fail (indicating a major moisture problem), multiple walls or the full perimeter show dampness after rain, cracks are widening or horizontal, sewer backup is recurring, or you cannot identify the source after running through the checks in this guide. Bring your photos, timing logs, and test results — they'll make the diagnostic visit faster and more accurate.